Your guide for Payop’s WooCommerce plugin integration
For the convenience of different industries, we offer three main integration options: API, technical integrators and plugins. In this article, we will step by step walk through the process of connecting Payop payment methods to your E-Commerce website using the WooCommerce plugin.
Before we start, we would like to remind you that integration is only possible after full account and project verification. By projects in our system, we mean websites. You can add an unlimited number of them in your merchant account.
Step #1: Activate the Payop plugin on your WordPress website
The integration process starts with configuring and activating the Payop plugin on your WordPress website. Here, you have two options:
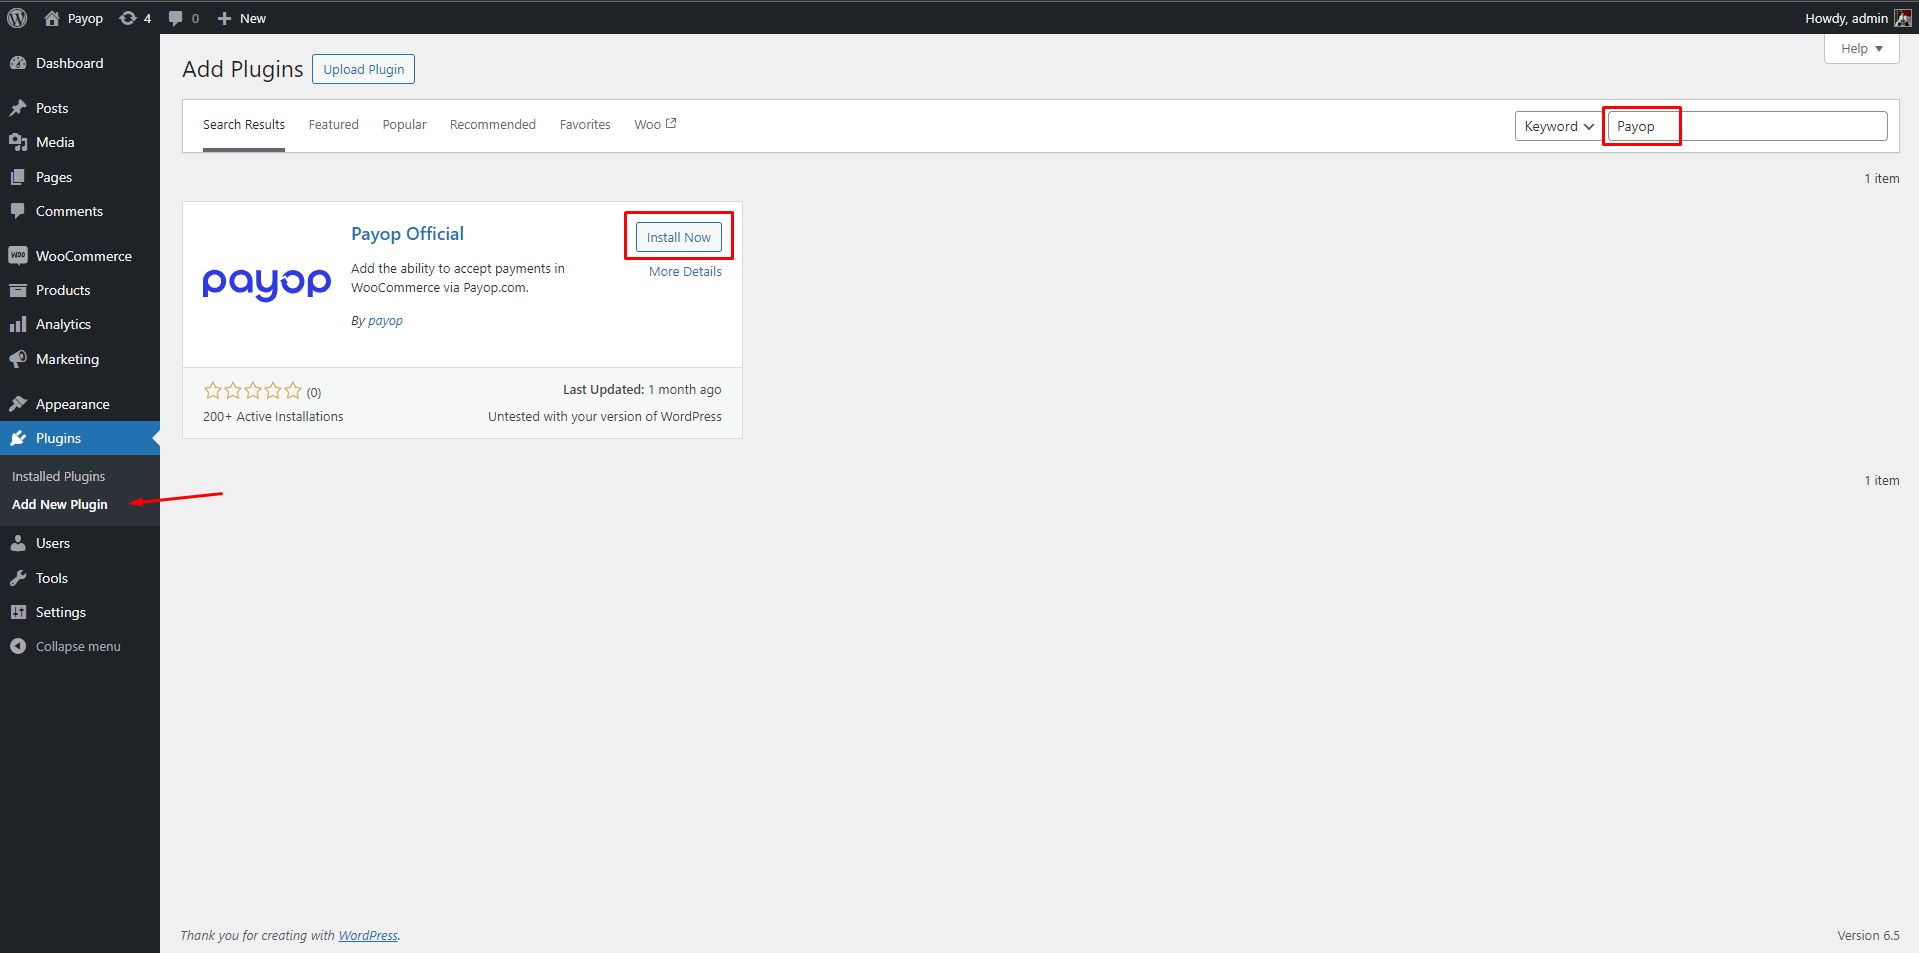
Installation from WordPress Plugin Store
You need to find the Plugins section in the WordPress admin panel and click the Add New button. Then, type “payop” in the search bar and click Install. Once the installation is completed activate the plugin with the corresponding button.
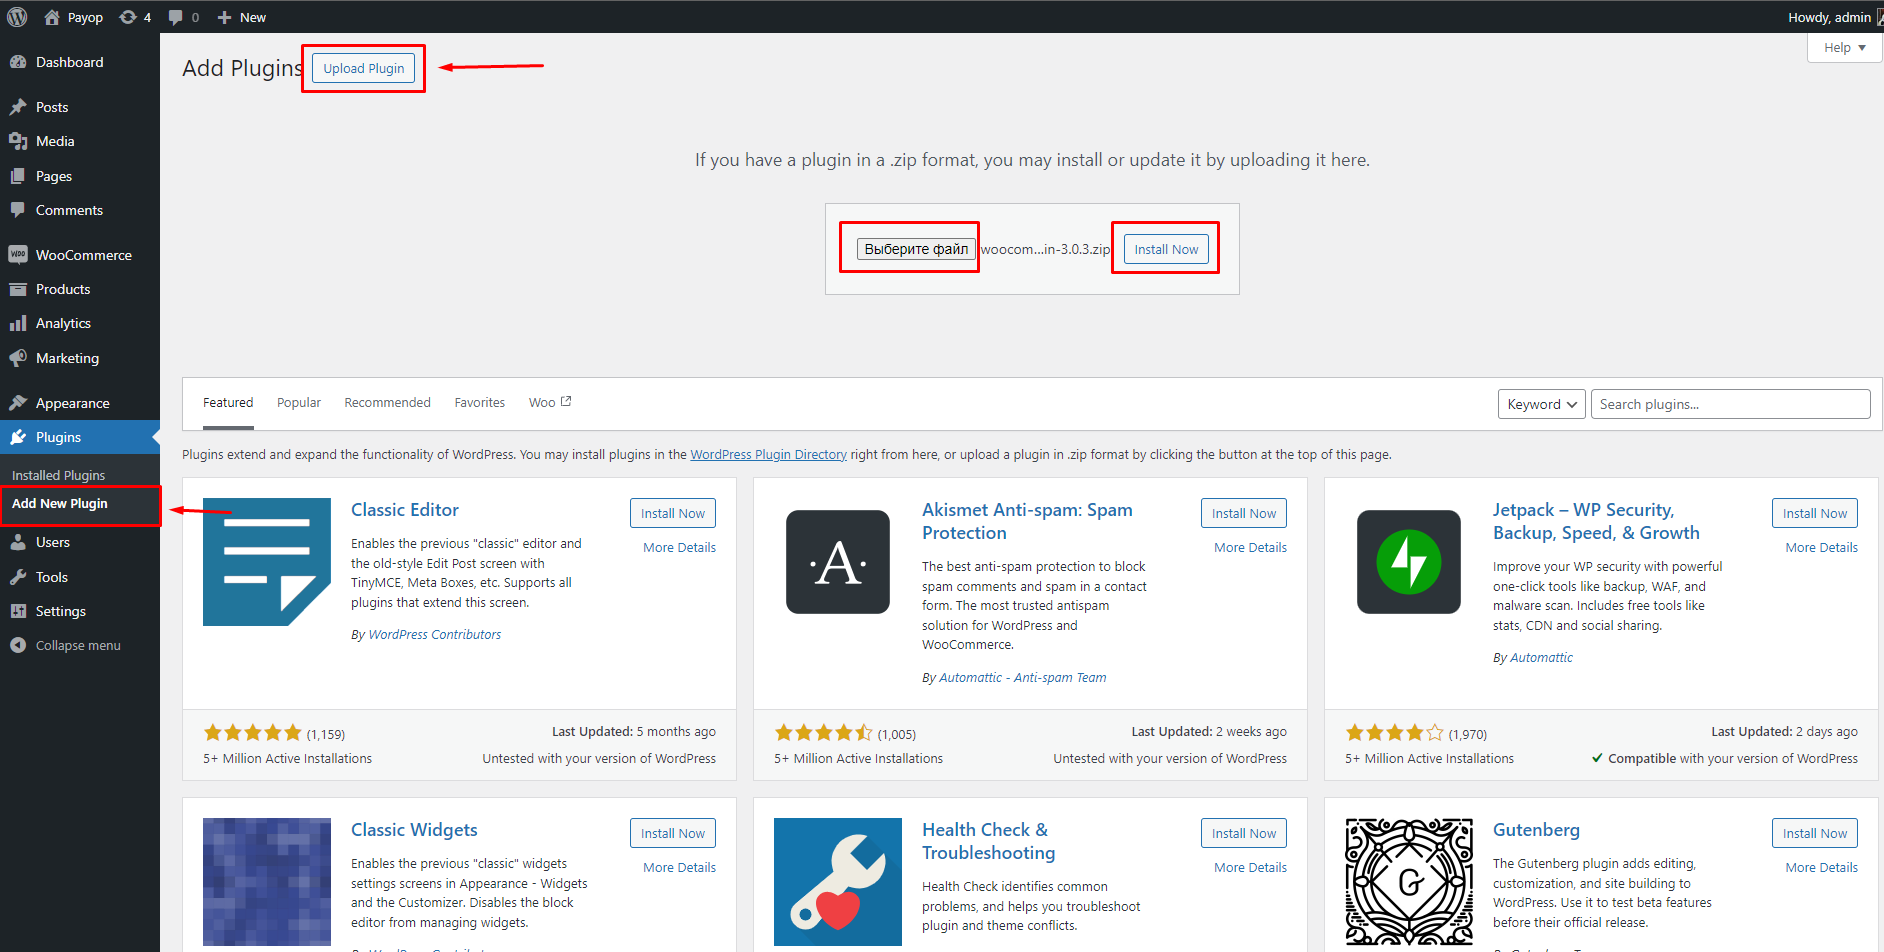
Manual installation
To install manually, go to the Payop plugin page and download the latest version in .zip format. Then, go to the Plugins section in the WordPress admin panel and click Add New. Choose the Upload Plugin option and go for your downloaded .zip file. Click Install and then Activate.
Step #2: Set up the Payop Plugin in WooCommerce
As your next and last step, you have to configure the Payop Plugin in WooCommerce. In order to do so:
- Choose WooCommerce in the left-hand menu in your WordPress admin panel.
- Go to the Settings tab in the drop-down menu list.
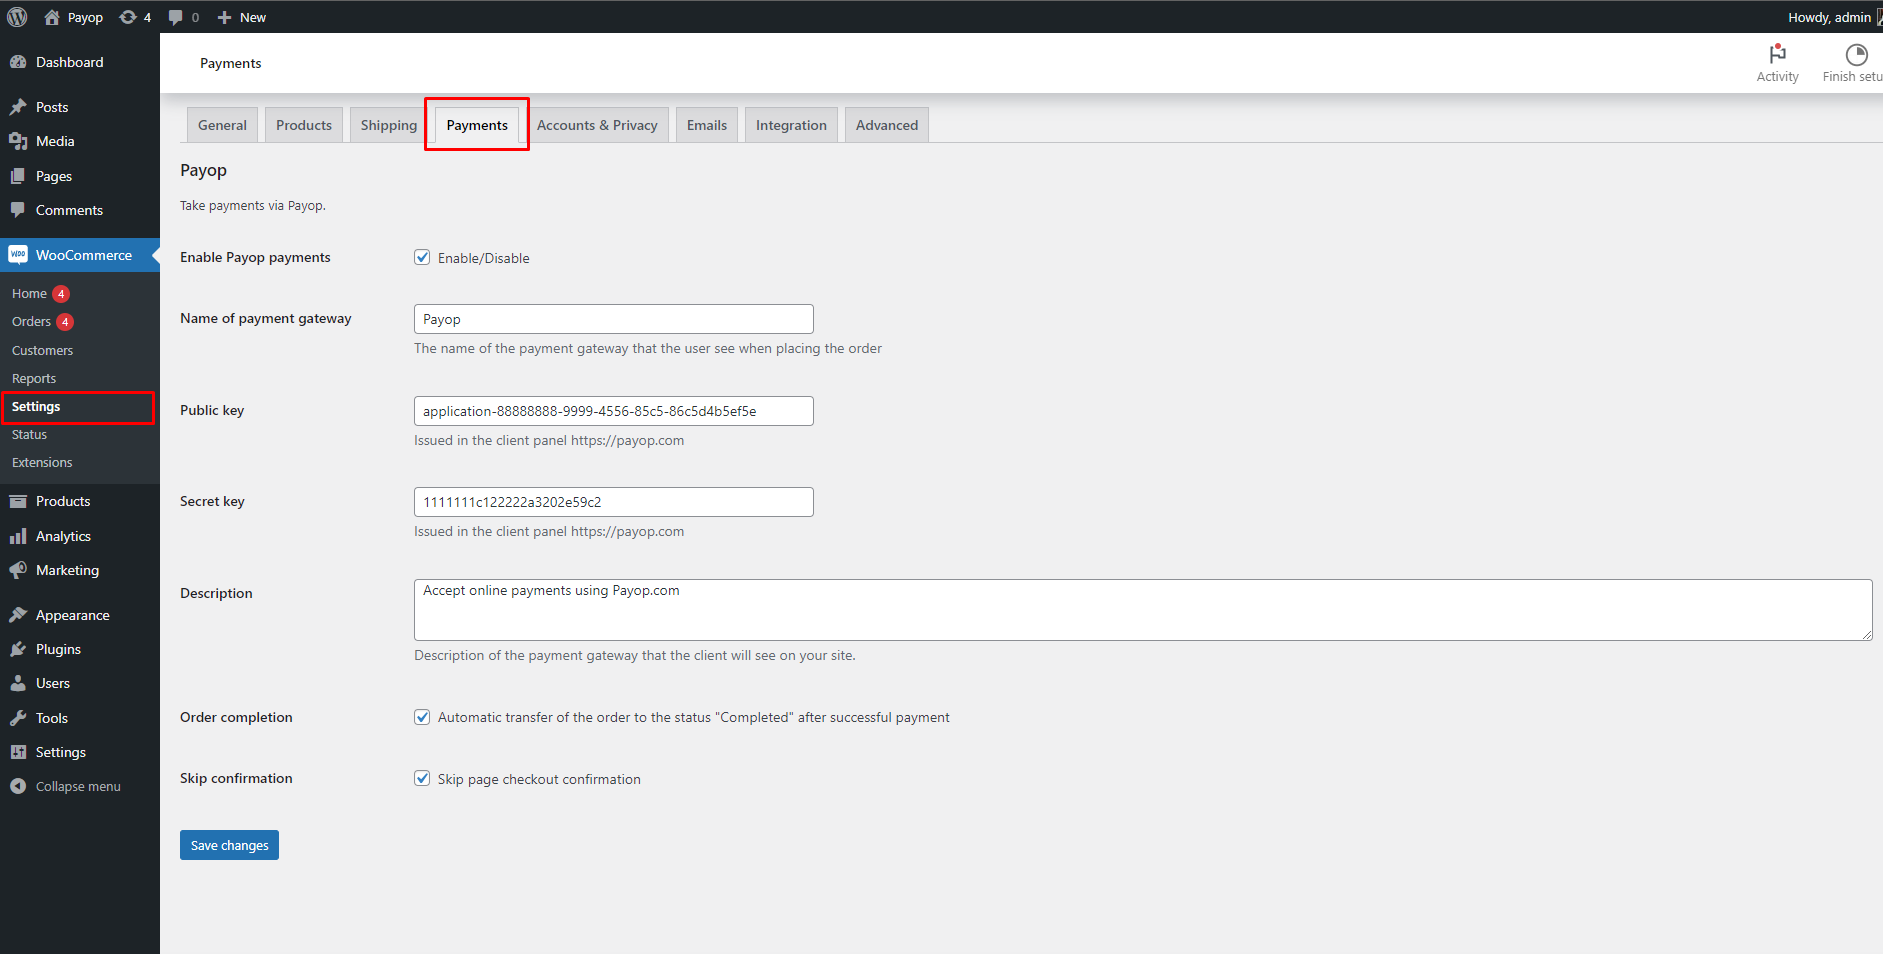
- Navigate to Payments in the top menu bar and select Payop in the list of available payment methods.
- On the page that opens, fill in all the data required for the plugin to function correctly: the name of the payment gateway, Public and Secret keys, a description of the payment gateway for your customers.
You will also see three checkboxes:
1. Order completion – allows the order to be automatically transferred to the Completed status after successful payment.
2. Skip confirmation – allows you to skip the confirmation page during the checkout process, streamlining the payment process for customers.
3. Enable Payop payments – allows you to enable or disable the Payop payment gateway on your website.
- To complete the installation, make sure you save changes with the Save or Update button.
Congratulations, you have successfully configured Payop’s WooCommerce plugin!
If you have additional questions or require assistance with the installation, you can always check our FAQ or contact your dedicated account manager.